Git
Installing and configuring git
How will you run git on your system? If you prefer the command line (which is the best way to use git), just install git and you are good to go.
You can install git on a Debian system using:
sudo apt-get install git
or on a Red Hat based system
sudo yum install git
and on Mac
brew install git
For Windows, to get a git shell you can install TortoiseGit.
If you prefer to work with a GUI, you could install GitKraken on all three Operating Systems.
If you are using a terminal, the first thing to do is configure git with your username and email.
The username will be printed on the commits and changes you make.
The email will be used to log in. You will be prompted for your password when pushing and pulling from the server.
git config --global user.name "[your_username]"
git config --global user.email "[your_email]"
A basic git tutorial
The basic operations with git are pretty simple.
You can find a list of commands here.
In general, the most typical use of git consists of:
git initto initialize a new repositorygit clone <url/to/your/hosted/repository>to copy a repository onto your local computergit add <path_to_file_you_want_to_add>to make a list of changes you made locallygit committo make a log of your changesgit pushto send the changes to the online repositorygit pullto get changes.
There are plenty of nice turorials to learn git on the web.
The best way to get started with git would be to try out this short tutorial on the command line to familiarize yourself with the common
commands used by git. If you would like a more in-depth tutorial, follow along with this interactive web tutorial which features a built-in terminal that you can use to walk through the commands step by step.
The Bibucket tutorial from Atlassian is also a very comprehensive and detailed turorial, and overall, a good resource to find what you need.
Exercise
Start with this tutorial
Try the interactive web tutorial. Finish at least the four exercises in the “Introduction Sequence” section in the “Main” tab.
For the workshop, we expect you to know how to clone a repository, add and commit changes, push to, pull from the repository and some basic knowledge for moving and modifying the source tree.
Useful tips for commit messages
Let’s go over some standards to keep in mind when using git commit.
When you are committing your changes always use meaningful messages.
git commit -m "[a brief meaningful message explaining what the change was about]"
Avoid vague messages such as changed file x and fixed function y. The commit itself shows which files have been changed. The message should explain the functionality of the change.
Another important concept is that, each commit should have one functionality. It is not a good practice to make a lot of progress then push all the changes at once. The server will not run out of space if you do several commits. Commits are very useful to track the jobs you have completed.
When you find a conflict or something is not working, do not make duplicate files. For example, having main.tex and then creating main1.tex is confusing and voids the purpose of version control.
Commits can be undone. Conflicts can be resolved so don’t be afraid to make mistakes.
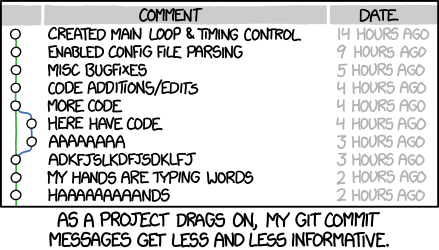
Do not let this happen to your code!
Tip
Read this guide on how to write better commit messages.
Git Workflows
A Git Workflow is a recipe or recommendation for how to use git to accomplish work in a consistent and productive manner.
Given git’s focus on flexibility, there is no standardized process on how to interact with git.
These workflows ensure that all the developers in a team are making changes to the project in a uniform fashion.
It is important to note that these workflows are more guidelines than strict rules.
Popular git workflows
Centralized workflow
Feature branch workflow
Gitflow
Forking workflow
You can read more about these over here. In the hands-on workshop task you will be using the feature branch workflow.
Version control for large files
git is decentralized, which means that changes in large files cause git repositories to grow by the size of the file (not by the size of the change) every time the file is committed.
Luckily, there are multiple third party implementations that will try to solve the problem, many of them use similar paradigms to provide solutions.
There are many routes one could go through to achieve this result. Some of them are mentioned below:
git-lfs: Git Large File Storage works by storing a pointer to the file in the git repository instead of the file itself. The blobs are written to a separate server using the Git LFS HTTP API. Hence, in order to use git-lfs your repository hosting platform must support it. Fortunately, GitHub, BitBucket and GitLab all support git-lfs. Learn more here.git-annex: Git-annex works by storing the contents of files being tracked by it to separate location. What is stored into the repository, is a symlink to the to the key under the separate location. In order to share the large binary files between a team for example the tracked files need to be stored to a different backend (like AmazonS3). Note that GitHub does not support git-annex (i.e. you cannot use GitHub as a backend) but GitLab does. Learn more here.datDat is a nonprofit-backed community & open protocol for building apps of the future. Use Dat command line to share files with version control, back up data to servers, browse remote files on demand, and automate long-term data preservation. Dat allows you to Track your files with automatic version history, share files with others over a secure peer to peer network and automate live backups to external HDs or remote servers. Learn more here.
The easiest way to get started with versioning your large file is by using git-lfs, but git-annex and dat offer more flexibility and are more modern options.