3. Version control with git
During your career as a researcher, you will write code and create documents over time, go back and edit them, reuse parts of it, share your code with other people or collaborate with others to make tools and documents.
Have you ever had the problem that you lost files that weren’t saved? Or have you gone to a conference or interview and met someone interested in your work and realized you don’t have the files on your laptop? On a gloomy day, have you changed some part of your code when suddenly everything broke and you wished you could just go back to the previous working version, but alas there is no backup and you have tens of folders with misleading names?
Or are you familiar with the scenario, in which you are working with a group, writing a function and then notice another person simultaneously making changes to the same file and you don’t know how to merge the changes? Or someone makes changes to your working version and now when you run it, everything crashes? Have you experienced these or a million other situations when you felt frustrated and stressed and spent hours trying to fix things and wished there was a time machine to go back in time? The time machine has been invented, version control.
- You can save all your code, data, and documents on the cloud, as you develop a project.
- You can manage the versions throughout time and see which changes were made at which time, and by whom.
- You can find other projects, import their scripts and modify them to reuse them for your purpose.
- You can share your code online: it’s good for science and it’s good for your resume.
- If you are a PhD student, you can start saving your files early on, and by the time you finish, you will have all your analyses documented and easily accessible, which will help a lot when you’re writing your thesis.
How does all the magic happen? Usually using git.
So what is git?
git is a open source tool, which features functionalities to make repositories, download them, get and push updates. It can allow for teams to work on the same project, manage conflicts, monitor changes and track issues.
Version control platforms
The most widely used version control platforms supporting git are Bitbucket and GitHub.
- Repositories on Bitbucket are by default private and only viewable by you and your team.
- Repositories on GitHub are by default public (everyone can see them), and to make them private you need to pay.
For a more comprehensive comparison of the two platforms see this comparison by UpGuard. When choosing a platform you must consider the limitations of each tool, and if you are employed in research, most likely, you will have to use the platform preferred by your research institute or company. Note that Bitbucket has a limitation on the number of teams one can make for free, and after some point you will need to pay.
Another platform for git is Gitlab.
So go on, start by signing up and making a username of these platforms. Use Bitbucket for in-progress work, and GitHub for publishing. Choose a professional ID for your GitHub account and put it on your CV.
Installing configuration
How will you run git on your system? If you prefer terminals, just install git and you are good to go. You can install git on a Debian system using:
sudo apt-get install git
or on a Red Hat based system
sudo yum install git
and on Mac
brew install git
For Windows, to get a git shell you can install TortoiseGit. If you prefer to work with a GUI, you could install gitKraken on all three Operating Systems.
If you are using a terminal, the first thing to do is configure git with your username and email. The username will be printed on the commits and changes you make. The email will be used to log in. You will be prompted for your password when pushing and pulling from the server.
git config --global user.name "[your_username]"
git config --global user.email "[your_email]"
git is pretty simple.
You can find a list of git commands here.
The most typical use of git consists of: git init to initialize a new repository, git clone to copy a repository onto your local computer, git add to make a list of changes you made locally, git commit to make a log of your changes, git push to send the changes to the online repository, and git pull to get changes.
SSH vs HTTPS
The connection to the server is secured with SSH or HTTPS. It is recommended to use HTTPS, but if you want to, you can use SSH. GitHub explains which URL to use. Typically when cloning you will see sometimes the repository has a .git at the end, and sometimes it doesn’t. If you use SSH you will need an SSH key. Read here to learn how to connect to GitHub with SSH Bitbucket gives you the option of using either one.
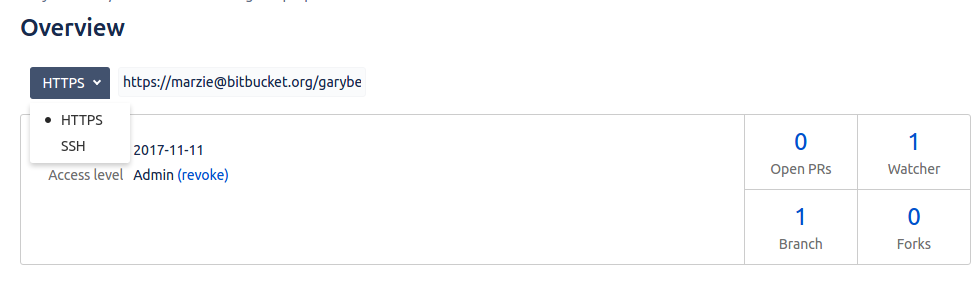
When using your_username to clone/fetch a repository from the_author, an SSH url will look like:
git@bitbucket.org:[the_author]/[repository].git
and HTTPS will look like:
https://[your_username]@bitbucket.org/[the_author]/[repository].git.
git tutorial
There are plenty of nice turorials to learn git on the web.
The best may be the GitHub tutorial which features a built-in terminal that you can use to walk through the commands step by step.
The Bibucket tutorial from Atlassian is a very comprehensive and detailed turorial, and overall, a good resource to find what you need.
Try this at home
Start with the GitHub tutorial and finish the 15 modules of level 1. Notice the folder structure and the hidden .git folder. For the workshop, we expect you to know how to clone a repository, add and commit changes, push to, and pull from the repository.
Useful tips
Let’s go over some standards to keep in mind when using git.
commit messages
When you are committing your changes always use meaningful messages.
git commit -m "[a brief meaningful message explaining what the change was about]"
Avoid vague messages such as changed file x and fixed function y. The commit itself shows which files have been changed. The message should explain the functionality of the change.
Another important concept is that, each commit should have one functionality. It is not a good practice to make a lot of progress then push all the changes at once. The server will not run out of space if you do several commits. Commits are very useful to track the jobs you have completed.
When you find a conflict or something is not working, do not make duplicate files. For example, having main.tex and then creating main1.tex is confusing and voids the purpose of version control.
Commits can be undone. Conflicts can be resolved. And we will learn how to fix mistakes.
Semantic versioning
Have you ever wondered how developers decide how to number the different versions of their software?
Do they just randomly come up with numbers? No, the version number consists of 3 numbers, x.y.z where x is a major change, y is a minor change and z a patch. There is official documentation on this, which you can read if you are interested. But assume you have a tool that reads some data and performs some function on the data. If you find a bug and fix it, you publish the fix by adding to z. If you added a small functionality, for example support for compressed data input and compatibility with other tools, increase y. If you added another function to it, increase x.
GNU licensing
git is opensource.
If you use GitHub and/or Bitbucket, you can publish your tool with the GNU licensing.
GNU is open source, and open source does not mean free.
Whenever using code with GNU licensing, you must cite the authors/developers.
For more information on the license check the GNU organization documentation.
Readme and MarkDown syntax
It’s a good practice to make a Readme. The Readme file can be made online using the editors GitHub and Bitbucket provide. Typically they are written in MarkDown syntax, which is very simple. You might have heard about R MarkDown, but MarkDown is a syntax that R has knitted into its compiler. Again there are many tutorials to learn MarkDown. You can check the syntax on the Atlassian website.
A Readme should include information about:
- name of the tool and the version,
- what is this tool about,
- who are the authors,
- requirements and dependencies,
- how to install /clone it,
- how to run it,
- what is the input and output,
- licensing,
- how to cite it.
Look at this nice outline for a standard Readme file in MarkDown syntax. To get the source code click the Raw button on the top left.
Issue tracking
Both Bitbucket and GitHub allow for issue tracking. Members of a team can create an issue, assign it to a developer or admin, and comment on it. An issue can be marked according to its importance and type, for example, fixing a bug or adding functionality; and the issue can be resolved once it is has been taken care of. Issues can be linked to commits, to show which commit resulted in resolving an issue.
When a repository is publicly accessible, you can create issues to inform the developers there is a bug or a functionality you would be interested in. So, the next time you find an issue with some tool that you can’t resolve after trying for a few days, just post an issue on their GitHub repository.